Maya動畫教程
MAYA動畫教程:用BlendShape變形工具制作褶皺衣服
Maya Cloth is great for getting many cool, dynamic effects, but it adds complexity to your scene. You must spend time tweaking a bunch of variables and previewing your scene until you get things to look the way you want, and in some situations you may never get what you are looking for. If you are creating clothes for a character, you are additionally limited by the type of clothing you can create. For detailed and consistant results, cloth simulations may not be the best way to go.
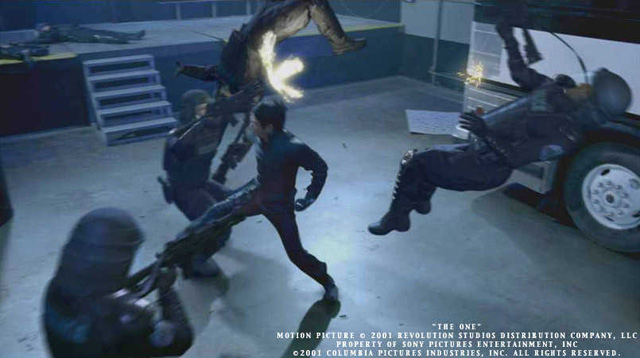
An alternative to using cloth simulators is to actually model the clothes you want your character to have, and create the wrinkles with a BlendShape deformer. This technique gives you predictable control over your model and works well in most situations. In fact, it was used in the movie "The One" to get a controlled, slow-motion look to the clothing on the CG police officers in the fight scenes with Jet Li's "Yulaw" character. The workflow for this technique goes like this:
Model clothes for your character using whatever geomtry you like Convert the geometry to polygons (it is much easier to create irregular wrinkles using polygons)IF you will be using a low-poly base shape connected to a smoothed high-resolution shape for animation purposes you may need to create some extra geometry for wrinkles Smooth-Bind the character and the clothing to your skeleton Paint skin weights to get the clothes and your character to deform correctly at the joints Create a BlendShape node and a Morph Target for your clothing Pick a joint and create wrinkles in the Morph Target Drive the BlendShape slider with the rotation of the joint Repeat 6 - 8 for all necessary joints .In this tutorial, we will be starting at step 5. However, we will not be going in depth on how to accomplish this step, because there is an excellent tutorial on Smooth Binding in the 'Instant Maya: Character Setup' section of the user guide (press 'F1' inside of Maya). We are only going to discuss the desired results here.
Before we start, I must explain the optional Step 3. A common workflow in animation is to have a low-resolution base shape that you use to animate. This drives a hidden high-resolution model that only gets unhidden at render time. This is usually accomplished with a wrap deformer, or with the connect poly shape plugin for Maya 3.x and 4.0, or with the new Smooth Proxy feature in Maya 4.5.
If you are using this technique, you may not have enough geometry to create distinct wrinkles in your model. Take a look at the image to the left. You can imagine how hard it would be to create believable wrinkles with such a small amount of geometry to work with. I used the 'Split Polygon' tool to create some extra edges where I thought my fabric would need to wrinkle. Compare the image here with this image. You'll see what I'm talking about.
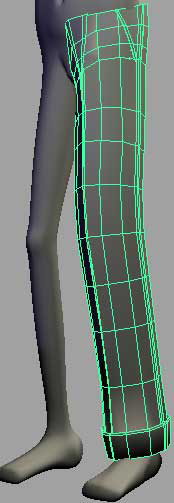
Step 5. Now it is time to bind your character and his or her clothes. Before you do so, create a copy of your clothing and translate it to the side of your model. Place it on its own layer so you can turn the visibility on and off. Creating a copy of your clothing now before you bind it is not necessary, but it will save you from headaches in Step 6.
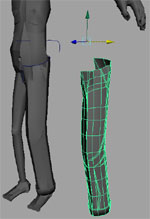
Use the Paint Skin Weights tool to get your bends looking correct, as in the image to the right. Try to imagine what you want your finished product to look like and start to really shape the way the fabric bends from there.
Step 6. Now you need to create a Morph Target for the BlendShape node. When the skeleton deforms your geometry as much as it does here, it is very important that the geometry is in the exact same position it was before you bound it when you go to create your morph targets. However, we got around this by creating a duplicate of our clothes before we bound our skin. The only other way to accomplish this is to return the skeleton to the bind pose by turning off the evaluation of constraints, expressions, IK handles and anything else that controls your skeleton first, then duplicating the clothing, unlocking all the attributes on the duplicated geometry and finally translating it to the side. Now aren't you glad you didn't have to go through all that?
Now you need to make a duplicate of your duplicate to edit. The original duplicate (hmm... an oxymoron) will serve as our reference from here on out to create new morph targets, so move it somewhere where you won't accidentaly edit it.
Now it's time to link this new shape to the original clothing as a morph target by creating a new BlendShape node. However, Maya has a bug in it that will not allow you to do this from the Deform pulldown menu in the Animate panel. Instead, we have to go ( Window > Animation Editors > Blend Shape ... ) This should bring up the BlendShape Panel which should have nothing in it at this point.
Select the duplicated shape, then shift-select the original clothing. Then, from the BlendShape panel go ( Edit > Create BlendShape ). This creates a new BlendShape node and adds the duplicated geometry as the first morph target. To add additional targets later, you must first select the target, then the original geometry and go ( Deform > Edit BlendShape > Add ).
In some cases this doesn't work correctly, and you will have to go to the Add options and manually type in the name of the BlendShape node as in the image to the left.
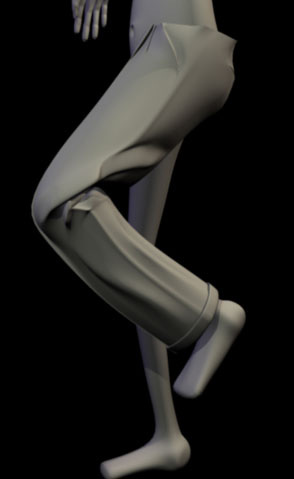
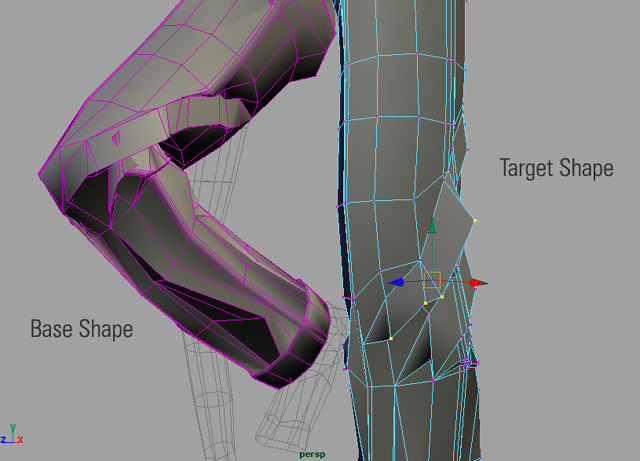
Step 7. Now it's time to decide what joint you're going to work on first. Once you've decided, go ahead and bend the joint to it's tightest angle. I'm starting with the knee. Imagine that. Next, go ahead and push the slider all the way up to 1 in the BlendShape panel as per the image on the right. This will allow you to immediatly see the changes you make in the target shape reflected in the base shape (the original clothing).
Now comes the fun part... start pushing and pulling faces, edges and vertices on the target shape until you like the look of the base shape. I also moved some of the vertices forward below the knee to give the appearance that the fabric is tightening and pulling against the calf.
Step 8. When you are happy with your work, it's time for the final step. We're going to set a driven key on the rotation of the joint that will drive the envelope of the BlendShape node. A driven key interpolates the values of the driven attribute through the specified range on the driver attribute, and is independant of time.
Your joint should still be bent to the extreme angle, so go ( Animate > Set Driven Key > Set > ). This should bring up the Set Driven Key panel. Select the joint and click Load Driver. Then, in the BlendShape panel, click the Select button under the slider. Back in the Set Driven Key panel, click Load Driven.
Now, highlight the rotation value of the proper joint axis in the Driver section of the Set Driven Key panel. This should be the Z-Axis, but may be the Y-Axis depending on how you built your skeleton. Then select the name of the BlendShape target under 'envelope' in the Driven section of the Set Driven Key panel. Remember to always select the Driver attributes first, modify them if necessary, and then select the Driven attributes and modify them. Once you have both attributes selected, click Key.
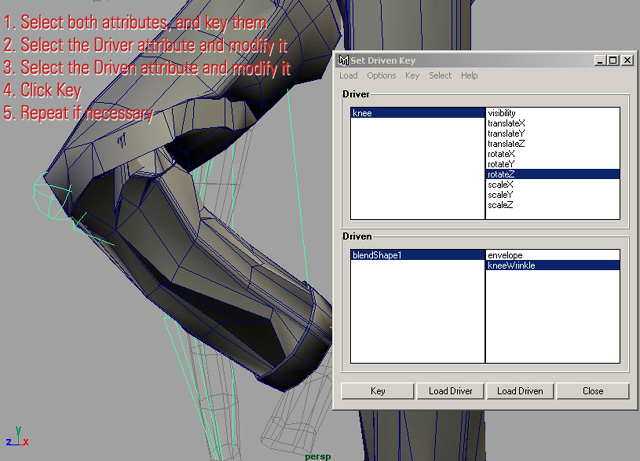
Next, move the skeleton back to the fully extended position. Then in the BlendShape panel, move the slider down to 0. Back in the Set Driven Key panel, click Key. You should now see that if you move the joint the wrinkles will slowly form as it approaches the extreme angle. You can now hide or delete the target shape (if you don't want to make any more modifications to it).
That's it! Now you just have to repeat steps 6 - 8 for all joints that will cause wrinkles in the clothing. Finally, the finished effect (Quicktime, double-click to play):
You can see how driven keys and BlendShape nodes can really enhance your character setup. You could also use this technique to create other effects like bulging muscles. The possibilities are endless!
